1. Getting started with Log Viewer PRO
Log Viewer PRO adds advanced monitoring tools directly inside WordPress admin. It is designed for users who need more than simple log viewing: repeated error detection, near real-time observation, reports, alerts and safer cleanup workflows.
With PRO, you can
- organize larger log lists more comfortably,
- watch selected logs update in near real time with Live Log Stream, Auto-refresh or Live Tail,
- pin selected logs for quick side-by-side observation,
- detect important phrases and custom keyword hits across monitored logs,
- send email or webhook alerts,
- review activity reports over time,
- run maintenance and cleanup tools more safely.
Recommended first setup
If this is your first time using Log Viewer PRO, configure the modules gradually. Start with one or two logs, confirm that they load correctly, and only then enable additional PRO workflows.
- Add a log in the main Log Viewer screen.
- Open the log and confirm that it loads correctly.
- Add Custom keywords if you want Log Viewer PRO to highlight phrases that matter in your debug files, such as Fatal, Timeout, Exception or CRON.
- Add selected logs to Log Hub if you want them included in PRO monitoring.
- Configure Log Hub phrases, ignore rules and Reports phrases only for logs that need them.
- Enable Email Alerts or Webhooks only after alert phrases are configured.
- Enable Reports collection if you need historical summaries.
- Configure Maintenance only after confirming that the selected log is correct.
- Use Log Inspector to verify whether a log participates in Log Hub, Reports, Alerts or Maintenance.
Main PRO screen
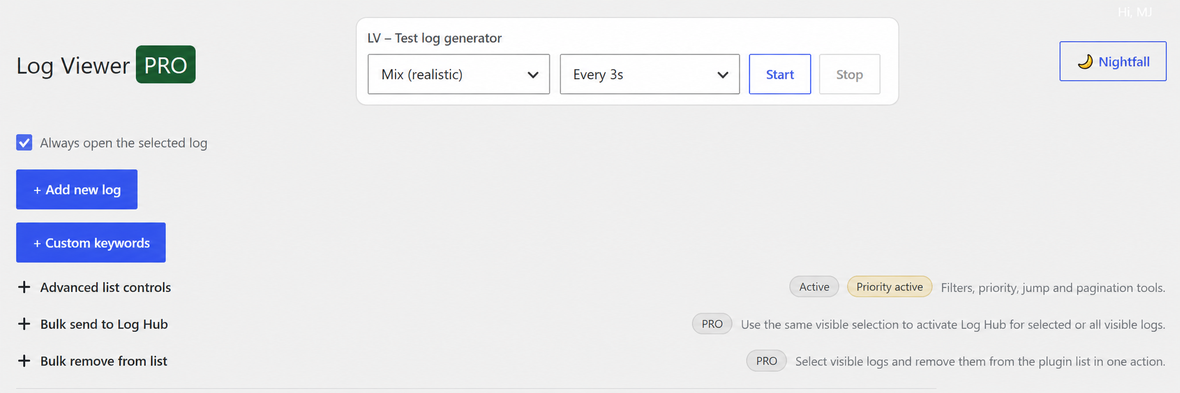
- Always open the selected log returns you to the same log window after refreshing the page or reopening the browser, so you can continue where you left off.
- + Add new log opens the form for adding a new log path.
- + Custom keywords opens the custom keyword manager for user-defined words or phrases that should be easier to notice while reading debug output.
- Nightfall changes the visual style of the log area.
Custom keywords
Custom keywords are useful when you repeatedly look for the same signals in debug logs, PHP logs, plugin logs or server logs. Add phrases that are meaningful for your workflow, for example Fatal, Timeout, Exception, CRON, payment failed or a plugin-specific phrase.
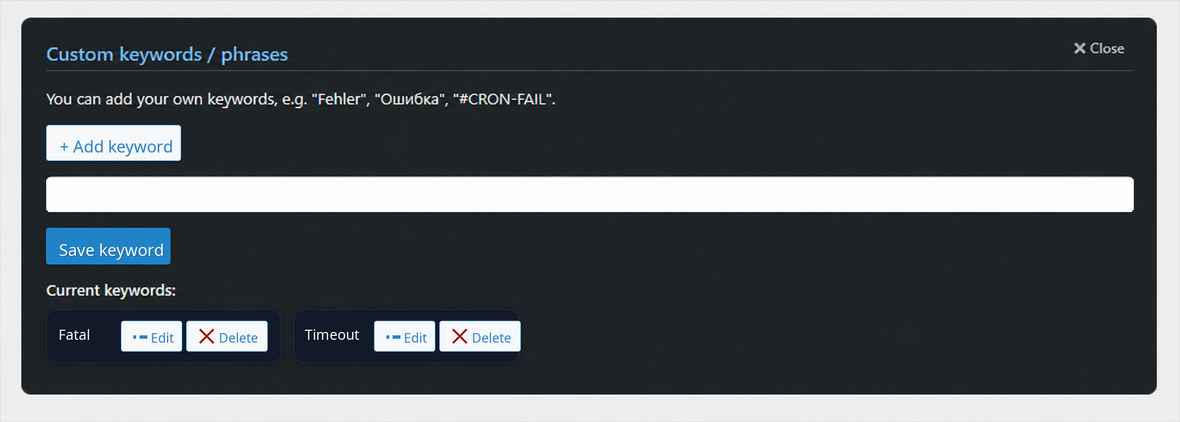
- Use short, specific phrases that are likely to appear in real log entries.
- Avoid adding too many generic words at once, because this can make the log view harder to read.
- Custom keywords help you notice recurring signals before you move into deeper PRO tools such as Log Hub, Reports or Alerts.
Add a new log
The most common first task is adding a log. In PRO, this can still be done quickly from the main screen.
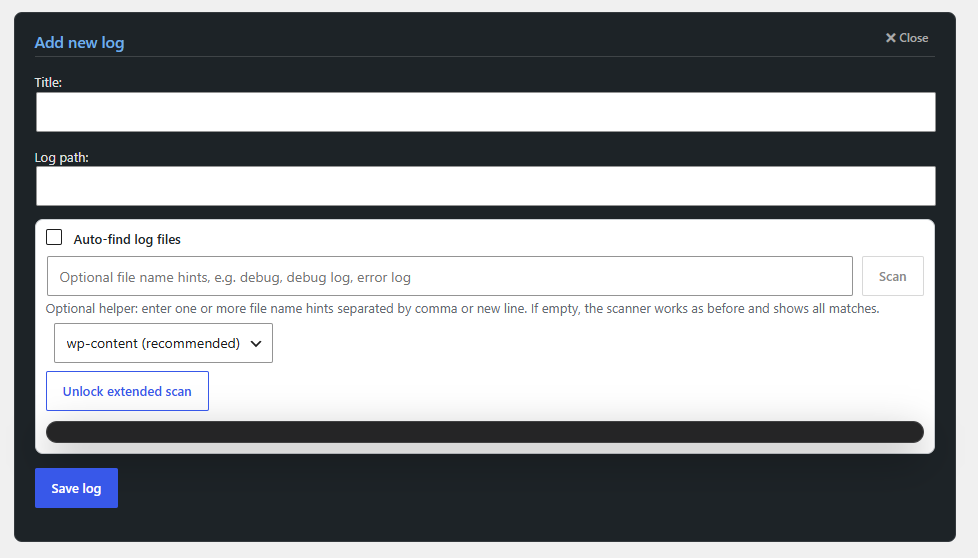
- Use a clear title so the log is easy to recognize later.
- The log path should point to the real file you want to monitor.
- Auto-find log files and the scanner help you find matching files more quickly.
- Unlock extended scan is only needed when you want to scan beyond the default safer locations.
- After saving, confirm that the log opens and displays content correctly.